Thursday, December 8, 2011

new iPhone case

A few months ago at a tradeshow, I was given a rubber iPhone case. I've been using it because it's practical but I wasn't thrilled about the logo. So boring! I stumbled across a few different versions of puffy painted iPhone cases (like the one Crafty Chica made, below) and inspiration hit!

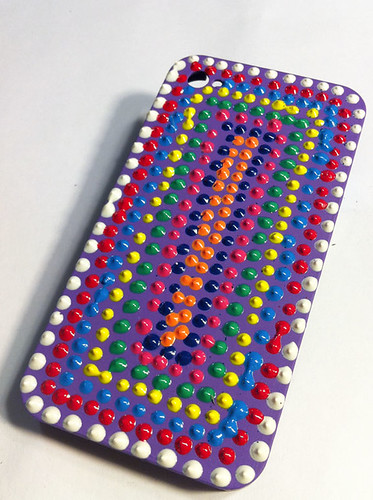
Puffy Paint iPhone4 Case

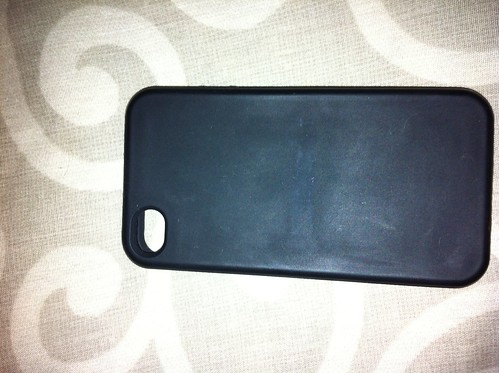
So I took up my logo'd case...

photo.JPG

And used some acetone to remove the logo. I used acetone made for nail salons (pure acetone, not drugstore-type nail polish remover, although that might have worked too) and a Q-tip and started rubbing.

photo.JPG

The acetone loosened the screenprinted logo pretty easily and little scrubbing circles with the Q-tip removed it completely in about 10 minutes.

photo.JPG

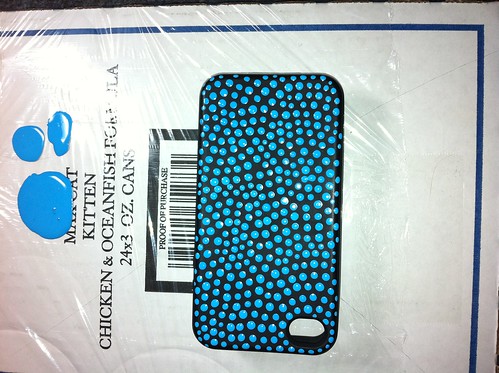
After it was totally clean, I got to work! Using my theory of "anything that holds still is an art table" I pulled a piece of saran wrap around a cat food box and set to work. I decided to use a bright blue because it makes me happy and I used my dot painting technique to create a circle pattern. I used a glossy acrylic craft paint which I already had on-hand. If you needed to purchase some from Michaels, you'd pay about $1 for the 2oz. bottle.

photo.JPG

It all came together pretty quick. From start to finish, I was done in less than one episode of 3rd Rock from the Sun (recommend TV viewing while painting!).

photo.JPG

Ta da! For a total cost of nothing and under 30 minutes of work, I completely customized my phone case. Now it looks like MY PHONE and has a bright burst of happy color!

photo.JPG

My two cents: I really like the outcome of the craft paint vs. puffy paint. Puffy paint leaves a peaked "kiss" on the surface which gives more texture but because I stuff my phone into a zipper pouch in my purse, I was afraid they'd snag and lift off or the peaks would tear. The acrylic gloss holds a textured dot but it's flatter and there are no "kisses", so it has a decent texture for gripping (on the arm of the couch, say) but won't snag on my zipper pouch.

Wednesday, December 7, 2011

I should probably stick to knitting

A while back, I decided to finally get down to learning crochet. I bought a book, watched some YouTube videos and trawled the internet for project ideas. I became enamored with granny square quilts. They're so ubiquitous that it seems every house in America has one. At some point your great aunt Ruthie sent one to the family and it's just been sitting in a linen cupboard somewhere, right?

I figured it couldn't be too hard, so I jumped in with both feet. An ambitious outlook to complete my own lap quilt (8 rows of 12 squares). I gathered up my supplies and got to hooking!

Master of crochet!

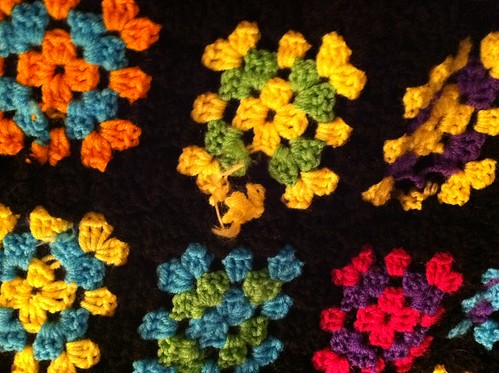
My first attempts were pretty loose and bumpy, but I figured once I got the hang of it, it would be no sweat! The two above each took 3 hours. No exaggeration. How does any grandma find the time for an entire quilt?!

The more I practiced, the quicker the squares came together. Still, I was averaging about 30 minutes per piece, but these things are a labor of love, right? I dragged my yarn bag and hook with me across the country while traveling for work and would hook up a few more squares every day while watching TV in my hotel room.

About 4 months later, I had enough to start assembling! Over the course of the last two weeks, I sewed together all of my squares and last night finished the last one. HUZZAH!

Only... they were still pretty loose and bumpy. I thought that it was acceptable for a beginner's project and since I was keeping it myself I could overlook the bumps. I also was hoping that a hot water wash and hot-hot dryer would help felt it all together.

It did... sorta.

photo.JPG

About 30% of my squares started to unravel. I guess I didn't finish all of the squares the same (honestly, I was winging it since I didn't REALLY know what I was doing). Toward the end, I had started tying the loose strings into knots and then weaving in the tails. It seems to have worked. Except for when it didn't.

I wouldn't say it's garbage-worthy just yet. I could still sew together some patches and probably fix a lot of it. But it's going to be MORE WORK. Either that, or the cat just got a new blankie!

I still don't know how grannies for centuries have managed to build these quilts. I have one that was given to me as a gift for my birthday and I marvel at it daily. The consistent stitches! The lovely scalloped edge! The even sewing! So at least I have one beautiful blanket to look at while I'm patching up my own quilt that looks like rats chewed it!

photo.JPG

Tuesday, November 29, 2011

glitter painted coffee table

My friend, Brad, is a store designer. A couple of years ago, he was working for Urban Outfitters (Ryan's old job) and they had a store plan to decorate with a bunch of tables. Which meant that he had to make a bunch of tables. What most people don't think about with store design elements is that they're only used for a limited time and then they're disposed of. So after this particular display was done, Brad had about 15 tables that he couldn't bear to part with -- they were a lot of hard work to make by hand! -- so he asked us if we wanted to take any of them. I snapped up this (handmade) coffee table that was painted in matte lime green.
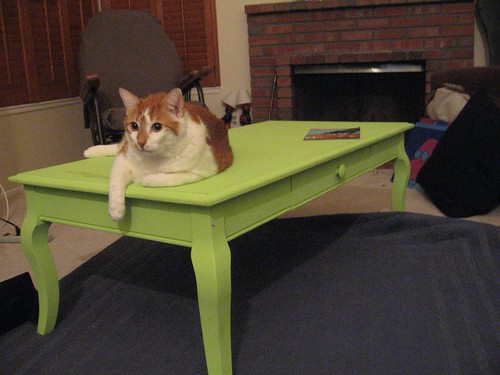
comfy table!

For the past couple of years, I had intended to repaint it. I love the lime green, but it needed some freshening up. I had been debating forever what and how to paint it... glossy green? More matte? Maybe a brighter green or add a harlequin print to it? After stalling for a REALLY long time, I saw that Krylon started making some really great glitter spray paints. After seeing some projects pop up here and there online, I thought THIS IS IT! I'll glitter paint my table!

I decided to stick with the lime green color palette that I already had on the table and chose the Citrus Dream type, which is mostly lime greens with a hint of golds and yellows. The can says that it will cover a 5x5 foot square area, so I picked up two cans thinking it would be more than enough for my 2x4" table.

My first test was on a plain, balsa wood embroidery hoop. One quick spritz did a pretty good job of covering, so I thought this would be a cake walk. The directions say that the paint dries in 20 minutes and can be handled in 24 hours. I figured within an hour, I'd have it totally painted and ready to gloss coat the top...

photo

So, I set up shop on the lawn. I got a big drop cloth to protect the grass, which was a REALLY good call because the glitter flies EVERYWHERE.  My table was pretty scruffy and had cup rings and even a pink patch where some felt got stuck to it (don't ask) but after a quick wipe down, it was ready to start. I figured that the glitter would cover the imperfections, like the cup rings, so I didn't repaint the table first.

glitter painted table, work in progress

Immediately, the paint was disappointing. Firstly, it's EXTREMELY fickle coming out of the tube (which I have since read is common for this paint). When you press the trigger, sometimes you'll get a blast of glitter and sometimes you get a blast of the clear adhesive. Mostly the adhesive. I found that the best thing to do was to shake for at least 60 seconds between sprays, but still you're glitter/adhesive ratio is spotty. The picture below shows the table after two cans of paint. As you can see, there are a lot of uneven patches, where the glitter would rush out suddenly -- even in the steady hand of a pro (my husband, Ryan), there was no amount of "smooth, sweeping motions" that could make it look any better. It's a bit hard to tell in this photo that after 2 cans of paint there was virtually no coverage of the tabletop below. Yes, it's sparkly but it's not GLITTERY and also you can see the cup rings and scuffs that were there to start with. If we had primed the table top white, I think it would have looked a hundred times worse.

Another paint can note: the can frequently jams and won't STOP spraying. This, too, seems to be common and there's no real solution for it. Unfortunately, it also wastes a lot of paint in the process. We would just point it at the table when ever it happened, but it was a sputtering stream and probably added more to the splotches.
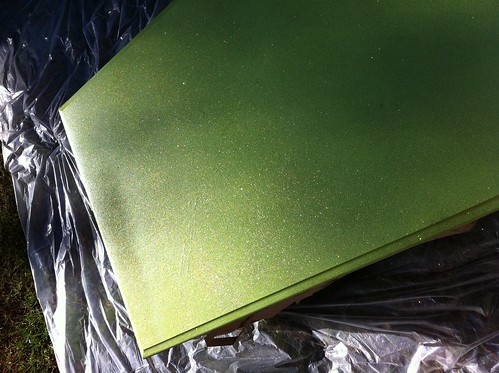
glitter painted table, work in progress

Another view of the "patches" of glitter below.

glitter painted table, work in progress

After letting it dry for a couple of hours, we did a touch test of one of the spotty areas and to our complete surprise, it came completely off. Because the glitter/adhesive mixture is so fickle, sometimes it is literally just spraying a pile of glitter so that any breeze would take it away. The drop cloth was a mess, which you can kind of see. I could pinch up piles of loose glitter. We were afraid to touch anywhere else because it left a gaping hole - straight down to the table top - where we'd lightly touched. Which then required MORE paint.

glitter painted table, work in progress

The picture above shows the table about 30 minutes after spraying a 5th coat. It should be dry, but you can clearly see dark streaks running across which we were hoping was wetness. It may have been, but it mostly seemed to be an uneven distribution of the glitter itself.

Below is where we decided to stop. This is 7 coats of glitter paint as even as we could possibly get it. LOTS of delicate touch ups to get the glitter where we wanted/needed it to be, including sprinkling the loose glitter from the drop cloth onto the table top.

photo

This is what it looks like now. We're going to go overboard on the sealant (which, by the way, the paint can does not mention or recommend but is made by Krylon and available with the glitter paint) to hold in as much glitter as possible. I would recommend that anyone using this really load up on the sealant, otherwise the first handling of your object will totally wipe it away. Not to mention get it all over (our house has glittery footprints everywhere and my bathtub will have green sparkles for the next 10 years).

I'm reasonably happy with it, although this took 2 days instead of 1 hour, and about 8 cans of glitter paint plus 2 cans of sealant to get it this far. It's still VERY imperfect and there are spots where the dings and scratches show through (could have been prevented with a fresh base coat of green). I like it, but I'm not willing to invest any more time or money in it. What I had envisioned being a quick project for under $20 has now been a significant pain in the neck. If it had turned out better, I would epoxy coat the top so that it would last forever, but since it's still not quite right I'll make do with shellac and sealant coats.

photo

In the end, I would NOT recommend this paint to someone wanting to take on a major project. It might be fine for small pieces or ceramic or something, but it is such a pain in the neck to even just get it to spray out of the can, that I probably would recommend a paint instead. In fact, on our 4th trip to the craft store for MORE PAINT I found a Martha Stewart craft paint in Golden Beryl that is the exact same color and is touted to have the same overall effect. The bottles are small, sure, but they're $2 so... yeah. You could probably pull off this whole table (legs included) for around $20.

Takeaways:

  • your base coat/primer WILL show through, so a complimentary color is recommended
  • you will use more than expected; don't buy based on can's recommendations
  • a sealant is 100% necessary to prevent the glitter from wiping off when you're done - DON'T touch it before you seal it
  • you will make a gigantic mess - be prepared to have glitter in your hair, clothes, food, and pets for a good long while. Because it's microglitter, it's nearly impossible to vacuum or even wash off and it will turn up everywhere. Trust me.
Wednesday, May 11, 2011

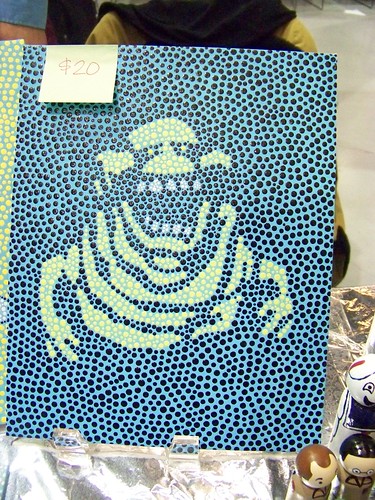
Slimer

This one is a bit different. I used a jack o'lantern stencil to paint it, so there's a lot more negative space, which I think looks interesting.

Slimer


. : * ~ * : . _ . : * ~ * : . _ . : * ~ * : .
Interested in owning a piece like this?
Check out my Etsy shop
or email me for a custom order!
. : * ~ * : . _ . : * ~ * : . _ . : * ~ * : .

Monday, May 9, 2011

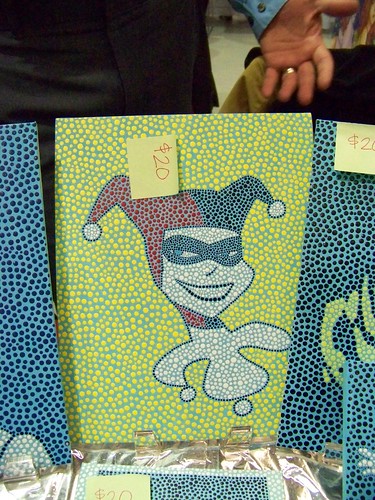
Harley Quinn

Harley Quinn


. : * ~ * : . _ . : * ~ * : . _ . : * ~ * : .
Interested in owning a piece like this?
Check out my Etsy shop
or email me for a custom order!
. : * ~ * : . _ . : * ~ * : . _ . : * ~ * : .

Thursday, May 5, 2011

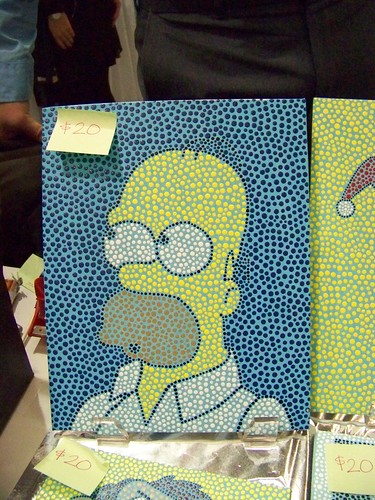
Homer

Homer


. : * ~ * : . _ . : * ~ * : . _ . : * ~ * : .
Interested in owning a piece like this?
Check out my Etsy shop
or email me for a custom order!
. : * ~ * : . _ . : * ~ * : . _ . : * ~ * : .

Tuesday, May 3, 2011

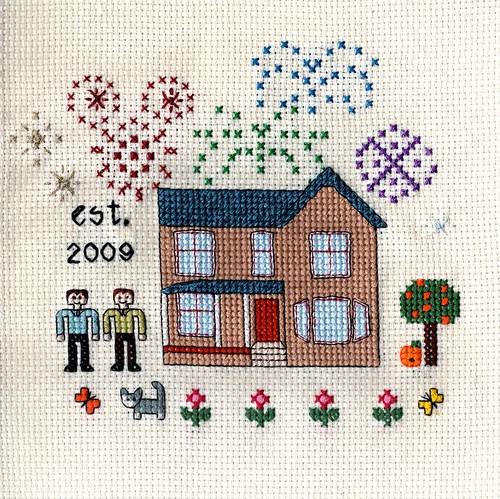
New House Sampler - only 2 years late!

Some friends of ours bought a house in 2009 and invited us over to see it. It's a fantastic old house, a certified "historic house" that has finally found its final resting place (read on for more). Anyway, the friends that we were visiting [names withheld, since they may not want people figuring out exactly where they live] are also artists and they have a marvelous studio space that is... like my dream studio. I want to just sit there and stare at stuff all day. I should ask if I can buy a ticket to do that... hmm... After spending an evening there and talking shop, Ryan and I were both ultra inspired to get home and "art" (we use 'art' as a verb). We'd been talking about the movie The 7 Faces of Dr Lao and how much everyone loved it, which inspired Ryan to create a colored pencil piece of Dr Lao. I was inspired by their new house and wanted to make them a "welcome home" craft piece.

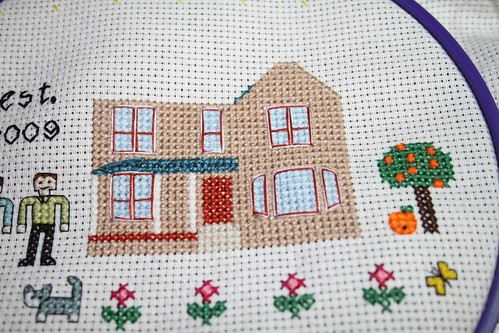
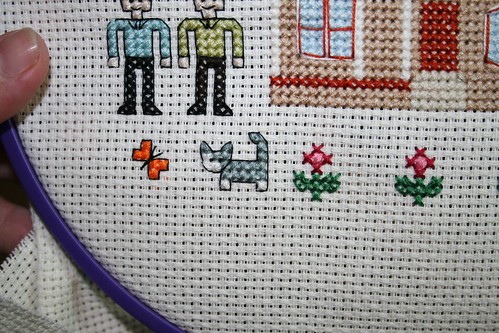
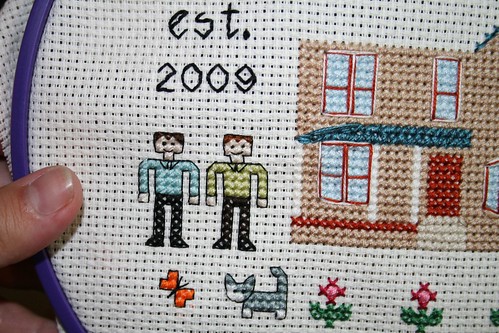
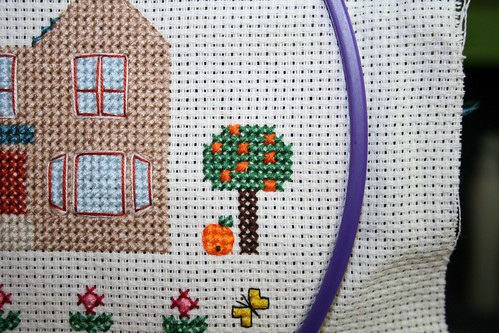
Their "new" old house (built in 1890) is in a historic home district of Anaheim, which is delightfully close to Disneyland. They have an unfettered view of the fireworks show (every night at 9:30!) so I knew I wanted to include the fireworks into this somewhat traditional sampler. There's always a Mickey shaped firework during the show, so I added that, too. I was originally thinking that I'd use a very traditional sampler approach, chock full of icons of their life but the "little" piece that I'd decided to make was already getting too large. But I did include their kitty and their blossoming orange tree.

Final Version

I finished it somewhat quickly - thanks to the great folks in the Phat Quarter who all sent me scraps of sparkle thread (so I didn't have to buy skeins of metallic threads that I probably would never use again) - and I intended to send it right away. Um, yeah. I delivered it a year and a half later. Oops!

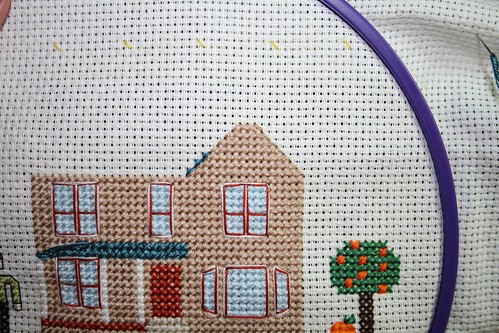
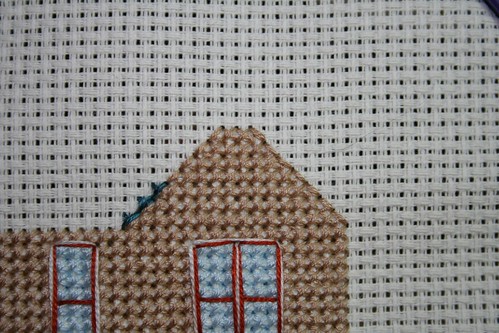
WIP of a sampler I made

I was particularly proud of my half-stitches, so I took a picture. Of course, you can't see them in the finished piece, but I know they're under there, looking good!

WIP of a sampler I made

I was on the fence about the outlining of the windows and doors. It worked, but looked kind of "loose" so in the end, I tore it all out and stitched one square at a time. It doesn't have the same straight-line look, but I like it better.
WIP of a sampler I made


WIP of a sampler I made


WIP of a sampler I made


WIP of a sampler I made

The original house, built in 1890. It has been moved several times in its life, as the city keeps expanding.


Below is a photo of the house being moved in the middle of the night to it's new (and hopefully final) location.


And here's what it looks like today. It's such an adorable home and I love the trim details (which were too detailed to capture in a cross stitch). Also, I think that I heard that this was originally the rear of the house, which now faces the street. The "back" of the house has the kitchen, which I believe used to be the entry point. But I kind of like it this way!

Monday, May 2, 2011

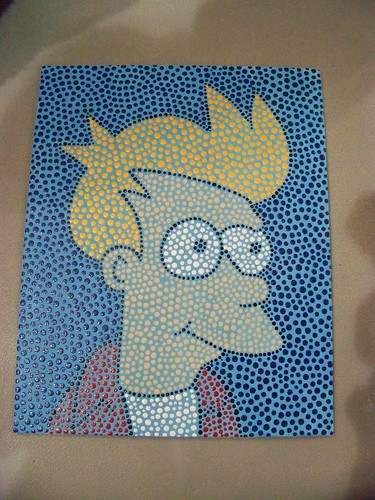
Fry

Fry


. : * ~ * : . _ . : * ~ * : . _ . : * ~ * : .
Interested in owning a piece like this?
Check out my Etsy shop
or email me for a custom order!
. : * ~ * : . _ . : * ~ * : . _ . : * ~ * : .

Wednesday, April 27, 2011

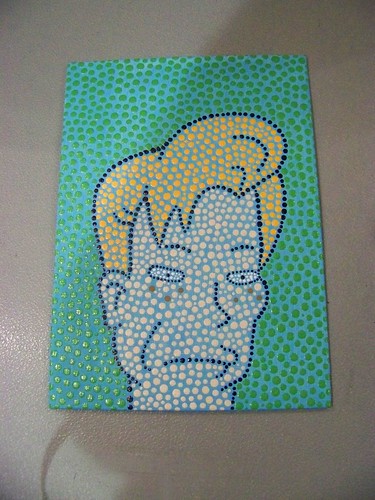
Conan O'Brien's head

Based on Conan's guest star appearance on Futurama, as a head in a jar.

Conan


. : * ~ * : . _ . : * ~ * : . _ . : * ~ * : .
Interested in owning a piece like this?
Check out my Etsy shop
or email me for a custom order!
. : * ~ * : . _ . : * ~ * : . _ . : * ~ * : .

Monday, April 25, 2011

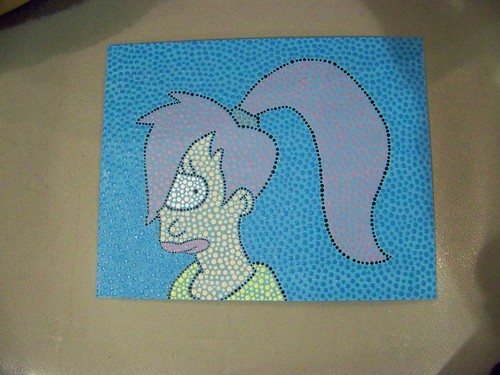
Leela

Leela


. : * ~ * : . _ . : * ~ * : . _ . : * ~ * : .
Interested in owning a piece like this?
Check out my Etsy shop
or email me for a custom order!
. : * ~ * : . _ . : * ~ * : . _ . : * ~ * : .

Friday, April 22, 2011

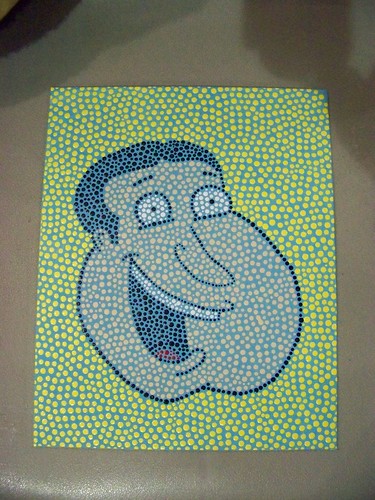
Quagmire

Quagmire


. : * ~ * : . _ . : * ~ * : . _ . : * ~ * : .
Interested in owning a piece like this?
Check out my Etsy shop
or email me for a custom order!
. : * ~ * : . _ . : * ~ * : . _ . : * ~ * : .

Wednesday, April 20, 2011

new Ghostbusters peg people

I had a couple of ideas for new peg people.
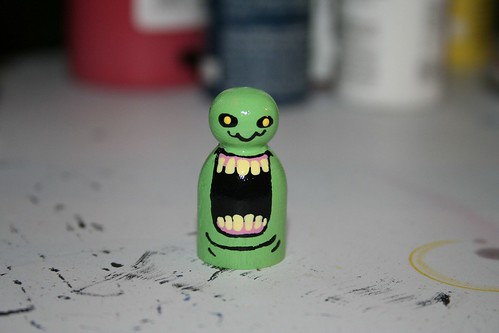
Slimer
Tiny Slimer is painted on a "baby" peg person form. He's less than 2 inches tall.

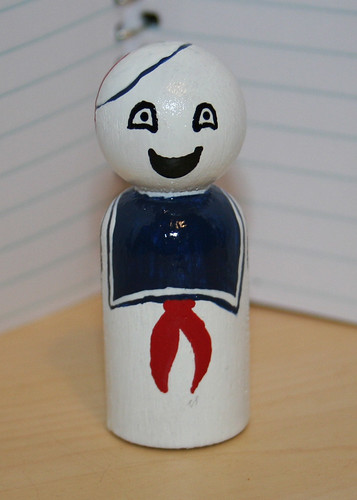
Stay Puft
Stay Puft is actually a BIG peg person form. He's nearly 4 inches tall.


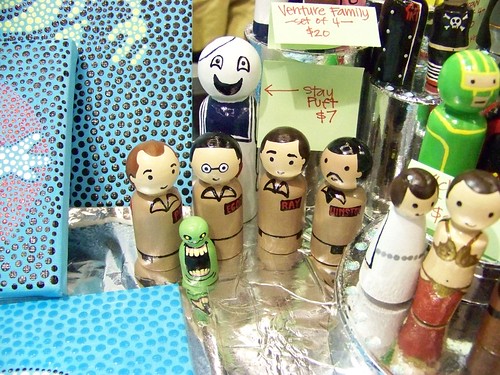
Ghostbusters!
This is what they look like, all together.

. : * ~ * : . _ . : * ~ * : . _ . : * ~ * : .
Interested in owning a piece like this?
Check out my Etsy shop
or email me for a custom order!
. : * ~ * : . _ . : * ~ * : . _ . : * ~ * : .

Monday, April 18, 2011

Mary Poppins

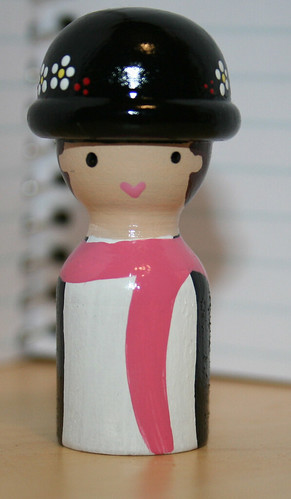
Playing with my new peg person forms with bowler hats

Mary Poppins


. : * ~ * : . _ . : * ~ * : . _ . : * ~ * : .
Interested in owning a piece like this?
Check out my Etsy shop
or email me for a custom order!
. : * ~ * : . _ . : * ~ * : . _ . : * ~ * : .

Saturday, April 16, 2011

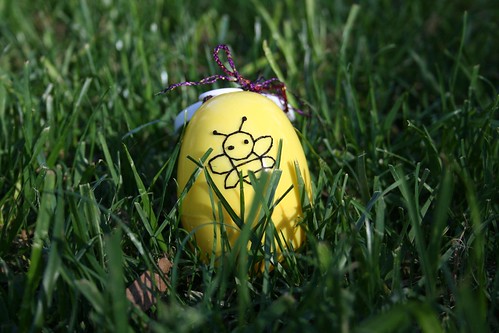
Hand Embroidered Easter Egg

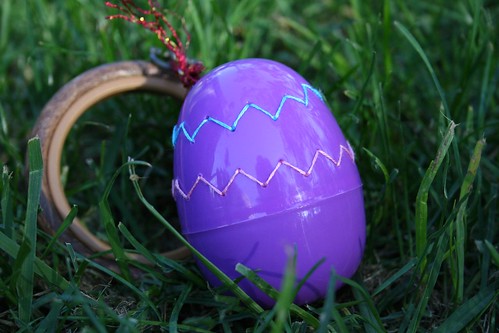
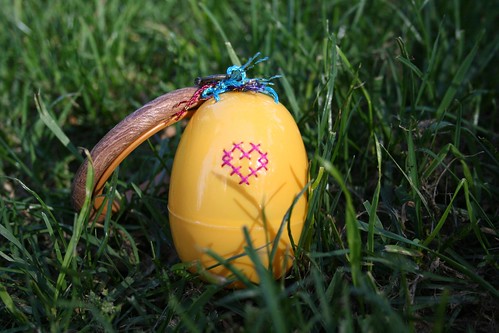
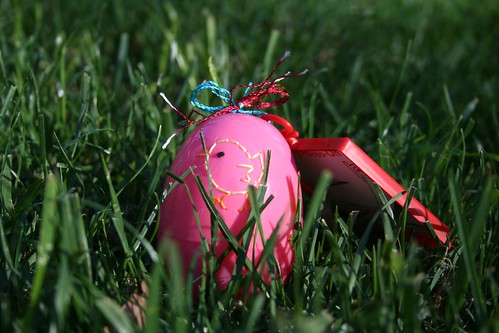
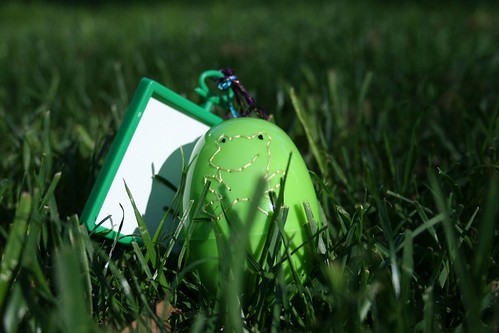
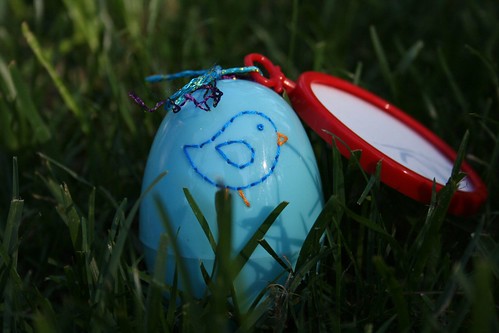
New! I took jumbo sized plastic Easter eggs and added a hand-embroidered touch. Inside is an extra prize for your favorite stitcher. Add these to your Easter basket for a personal touch.

Each egg comes with an embroidery hoop and inside is aida cloth, various patterns with coordinated floss, and a needle. While everyone else is hunting for eggs in the tall grass, you can be stitching a lasting memory!

hand embroidered egg


. : * ~ * : . _ . : * ~ * : . _ . : * ~ * : .
Interested in owning a piece like this?
Check out my Etsy shop
or email me for a custom order!
. : * ~ * : . _ . : * ~ * : . _ . : * ~ * : .

Thursday, April 14, 2011

Hand Embroidered Easter Egg

New! I took jumbo sized plastic Easter eggs and added a hand-embroidered touch. Inside is an extra prize for your favorite stitcher. Add these to your Easter basket for a personal touch.

Each egg comes with an embroidery hoop and inside is aida cloth, various patterns with coordinated floss, and a needle. While everyone else is hunting for eggs in the tall grass, you can be stitching a lasting memory!

Hand Embroidered Egg


. : * ~ * : . _ . : * ~ * : . _ . : * ~ * : .
Interested in owning a piece like this?
Check out my Etsy shop
or email me for a custom order!
. : * ~ * : . _ . : * ~ * : . _ . : * ~ * : .

Wednesday, April 13, 2011

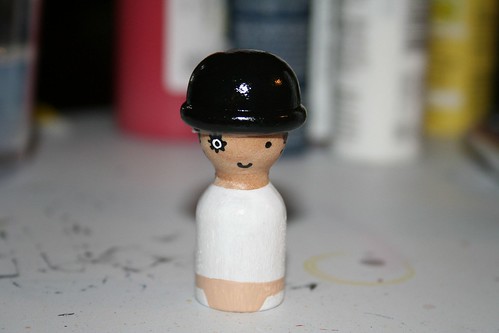
Clockwork Orange, Alex

Playing with this new peg person form with a bowler hat.

Alex, Clockwork Orange


. : * ~ * : . _ . : * ~ * : . _ . : * ~ * : .
Interested in owning a piece like this?
Check out my Etsy shop
or email me for a custom order!
. : * ~ * : . _ . : * ~ * : . _ . : * ~ * : .

Tuesday, April 12, 2011

Hand Embroidered Easter Egg

New! I took jumbo sized plastic Easter eggs and added a hand-embroidered touch. Inside is an extra prize for your favorite stitcher. Add these to your Easter basket for a personal touch.

Each egg comes with an embroidery hoop and inside is aida cloth, various patterns with coordinated floss, and a needle. While everyone else is hunting for eggs in the tall grass, you can be stitching a lasting memory!

Hand Embroidered Egg


. : * ~ * : . _ . : * ~ * : . _ . : * ~ * : .
Interested in owning a piece like this?
Check out my Etsy shop
or email me for a custom order!
. : * ~ * : . _ . : * ~ * : . _ . : * ~ * : .

Monday, April 11, 2011

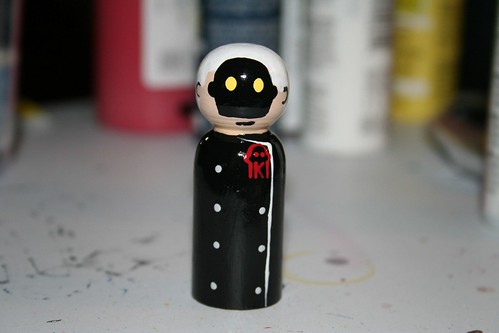
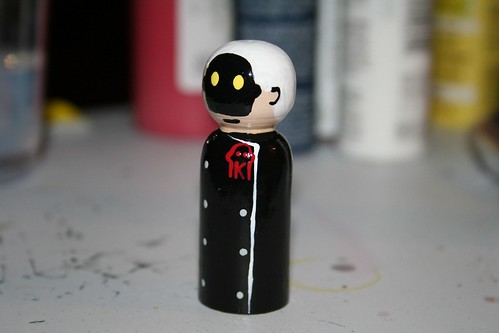
Dr. Henry Killinger

New to my Venture Brothers collection, it's Dr. Henry Killinger.

"Compromise, my friend, is the essence of diplomacy and diplomacy is the cornerstone of love"

Dr. Henry Killinger


Dr. Henry Killinger


. : * ~ * : . _ . : * ~ * : . _ . : * ~ * : .
Interested in owning a piece like this?
Check out my Etsy shop
or email me for a custom order!
. : * ~ * : . _ . : * ~ * : . _ . : * ~ * : .

Saturday, April 9, 2011

Hand Embroidered Easter Egg

New! I took jumbo sized plastic Easter eggs and added a hand-embroidered touch. Inside is an extra prize for your favorite stitcher. Add these to your Easter basket for a personal touch.

Each egg comes with an embroidery hoop and inside is aida cloth, various patterns with coordinated floss, and a needle. While everyone else is hunting for eggs in the tall grass, you can be stitching a lasting memory!

Hand Embroidered Egg


. : * ~ * : . _ . : * ~ * : . _ . : * ~ * : .
Interested in owning a piece like this?
Check out my Etsy shop
or email me for a custom order!
. : * ~ * : . _ . : * ~ * : . _ . : * ~ * : .

Thursday, April 7, 2011

Hand Embroidered Easter Egg

New! I took jumbo sized plastic Easter eggs and added a hand-embroidered touch. Inside is an extra prize for your favorite stitcher. Add these to your Easter basket for a personal touch.

Each egg comes with an embroidery hoop and inside is aida cloth, various patterns with coordinated floss, and a needle. While everyone else is hunting for eggs in the tall grass, you can be stitching a lasting memory!

Hand Embroidered Egg


. : * ~ * : . _ . : * ~ * : . _ . : * ~ * : .
Interested in owning a piece like this?
Check out my Etsy shop
or email me for a custom order!
. : * ~ * : . _ . : * ~ * : . _ . : * ~ * : .

Wednesday, April 6, 2011

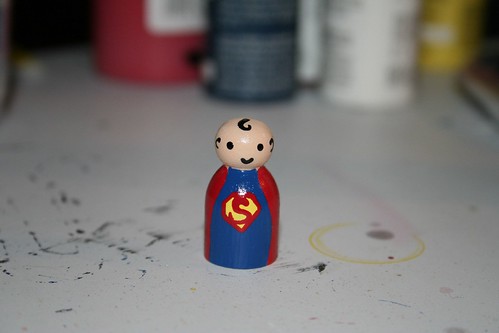
baby Superman

A little girl advised me that I should make baby superheroes. So I did. These little figures are 1 3/16 inch tall!

baby Superman


. : * ~ * : . _ . : * ~ * : . _ . : * ~ * : .
Interested in owning a piece like this?
Check out my Etsy shop
or email me for a custom order!
. : * ~ * : . _ . : * ~ * : . _ . : * ~ * : .

Tuesday, April 5, 2011

Hand Embroidered Easter Egg

New! I took jumbo sized plastic Easter eggs and added a hand-embroidered touch. Inside is an extra prize for your favorite stitcher. Add these to your Easter basket for a personal touch.

Each egg comes with an embroidery hoop and inside is aida cloth, various patterns with coordinated floss, and a needle. While everyone else is hunting for eggs in the tall grass, you can be stitching a lasting memory!

Hand Embroidered Egg


. : * ~ * : . _ . : * ~ * : . _ . : * ~ * : .
Interested in owning a piece like this?
Check out my Etsy shop
or email me for a custom order!
. : * ~ * : . _ . : * ~ * : . _ . : * ~ * : .

Monday, April 4, 2011

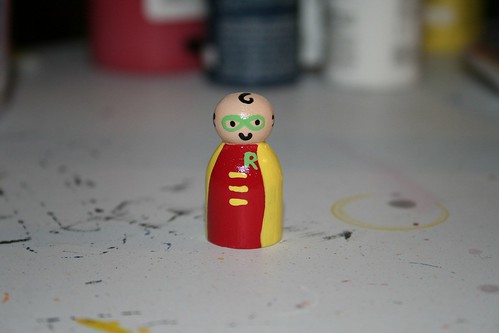
baby Robin

A little girl advised me that I should make baby superheroes. So I did. These little figures are 1 3/16 inch tall!

baby Robin


. : * ~ * : . _ . : * ~ * : . _ . : * ~ * : .
Interested in owning a piece like this?
Check out my Etsy shop
or email me for a custom order!
. : * ~ * : . _ . : * ~ * : . _ . : * ~ * : .

LinkWithin