
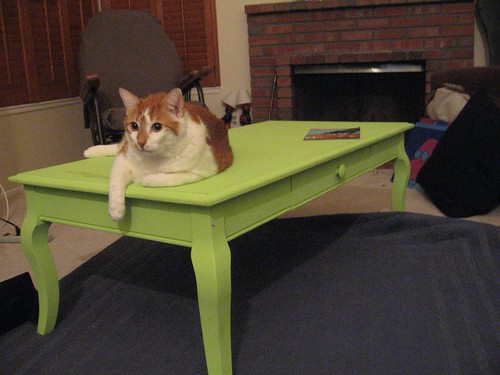
For the past couple of years, I had intended to repaint it. I love the lime green, but it needed some freshening up. I had been debating forever what and how to paint it... glossy green? More matte? Maybe a brighter green or add a harlequin print to it? After stalling for a REALLY long time, I saw that Krylon started making some really great glitter spray paints. After seeing some projects pop up here and there online, I thought THIS IS IT! I'll glitter paint my table!
I decided to stick with the lime green color palette that I already had on the table and chose the Citrus Dream type, which is mostly lime greens with a hint of golds and yellows. The can says that it will cover a 5x5 foot square area, so I picked up two cans thinking it would be more than enough for my 2x4" table.
My first test was on a plain, balsa wood embroidery hoop. One quick spritz did a pretty good job of covering, so I thought this would be a cake walk. The directions say that the paint dries in 20 minutes and can be handled in 24 hours. I figured within an hour, I'd have it totally painted and ready to gloss coat the top...

So, I set up shop on the lawn. I got a big drop cloth to protect the grass, which was a REALLY good call because the glitter flies EVERYWHERE. My table was pretty scruffy and had cup rings and even a pink patch where some felt got stuck to it (don't ask) but after a quick wipe down, it was ready to start. I figured that the glitter would cover the imperfections, like the cup rings, so I didn't repaint the table first.

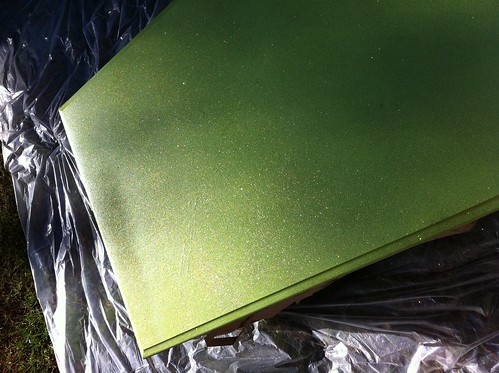
Immediately, the paint was disappointing. Firstly, it's EXTREMELY fickle coming out of the tube (which I have since read is common for this paint). When you press the trigger, sometimes you'll get a blast of glitter and sometimes you get a blast of the clear adhesive. Mostly the adhesive. I found that the best thing to do was to shake for at least 60 seconds between sprays, but still you're glitter/adhesive ratio is spotty. The picture below shows the table after two cans of paint. As you can see, there are a lot of uneven patches, where the glitter would rush out suddenly -- even in the steady hand of a pro (my husband, Ryan), there was no amount of "smooth, sweeping motions" that could make it look any better. It's a bit hard to tell in this photo that after 2 cans of paint there was virtually no coverage of the tabletop below. Yes, it's sparkly but it's not GLITTERY and also you can see the cup rings and scuffs that were there to start with. If we had primed the table top white, I think it would have looked a hundred times worse.
Another paint can note: the can frequently jams and won't STOP spraying. This, too, seems to be common and there's no real solution for it. Unfortunately, it also wastes a lot of paint in the process. We would just point it at the table when ever it happened, but it was a sputtering stream and probably added more to the splotches.
Another view of the "patches" of glitter below.

After letting it dry for a couple of hours, we did a touch test of one of the spotty areas and to our complete surprise, it came completely off. Because the glitter/adhesive mixture is so fickle, sometimes it is literally just spraying a pile of glitter so that any breeze would take it away. The drop cloth was a mess, which you can kind of see. I could pinch up piles of loose glitter. We were afraid to touch anywhere else because it left a gaping hole - straight down to the table top - where we'd lightly touched. Which then required MORE paint.

The picture above shows the table about 30 minutes after spraying a 5th coat. It should be dry, but you can clearly see dark streaks running across which we were hoping was wetness. It may have been, but it mostly seemed to be an uneven distribution of the glitter itself.
Below is where we decided to stop. This is 7 coats of glitter paint as even as we could possibly get it. LOTS of delicate touch ups to get the glitter where we wanted/needed it to be, including sprinkling the loose glitter from the drop cloth onto the table top.

This is what it looks like now. We're going to go overboard on the sealant (which, by the way, the paint can does not mention or recommend but is made by Krylon and available with the glitter paint) to hold in as much glitter as possible. I would recommend that anyone using this really load up on the sealant, otherwise the first handling of your object will totally wipe it away. Not to mention get it all over (our house has glittery footprints everywhere and my bathtub will have green sparkles for the next 10 years).
I'm reasonably happy with it, although this took 2 days instead of 1 hour, and about 8 cans of glitter paint plus 2 cans of sealant to get it this far. It's still VERY imperfect and there are spots where the dings and scratches show through (could have been prevented with a fresh base coat of green). I like it, but I'm not willing to invest any more time or money in it. What I had envisioned being a quick project for under $20 has now been a significant pain in the neck. If it had turned out better, I would epoxy coat the top so that it would last forever, but since it's still not quite right I'll make do with shellac and sealant coats.

In the end, I would NOT recommend this paint to someone wanting to take on a major project. It might be fine for small pieces or ceramic or something, but it is such a pain in the neck to even just get it to spray out of the can, that I probably would recommend a paint instead. In fact, on our 4th trip to the craft store for MORE PAINT I found a Martha Stewart craft paint in Golden Beryl that is the exact same color and is touted to have the same overall effect. The bottles are small, sure, but they're $2 so... yeah. You could probably pull off this whole table (legs included) for around $20.
Takeaways:
- your base coat/primer WILL show through, so a complimentary color is recommended
- you will use more than expected; don't buy based on can's recommendations
- a sealant is 100% necessary to prevent the glitter from wiping off when you're done - DON'T touch it before you seal it
- you will make a gigantic mess - be prepared to have glitter in your hair, clothes, food, and pets for a good long while. Because it's microglitter, it's nearly impossible to vacuum or even wash off and it will turn up everywhere. Trust me.